My lightboxes are too bright. What should I do?
Most commercial retailers want their backlit display lightboxes to be as bright as possible, to increase impact and turn more heads, thereby generating more exposure and brand awareness. Still, once in a while a store manager or retail space planner will look at a lightbox after it’s installed and determine that it’s too bright for their needs — maybe the site is a nightclub with relatively low lighting, or the lightboxes are intended as a secondary accent to another more predominant display fixture, or maybe it’s just a matter of general preference.
If lightboxes have been built-to-order and delivered, it’s usually not cost-effective to return them to the fabricator for a “downgrade” in brightness. Not only does this triple your shipping costs, you also have the tentative situation of trying to re-package large, fragile display products properly to mitigate damage in transit. Plus of course, there’s the costs for either re-stocking the overbright lightboxes and/or retrofitting the units for dimmability or other brightness-reduction scheme.
When lower backlight intensity is desired, it’s best to engineer your new lightboxes from the beginning with low light in mind, so that the entire lightbox design can be optimized for this. However, the catch 22 is, since desired light level can be subjective (depending on viewing distance, type of graphic, and ambient light levels), you may not realize your new lightboxes are brighter than desired until after you’ve received and installed them.
Hence here are some strategies for reducing the brightness of your existing lightboxes:
TUBE SLEEVES
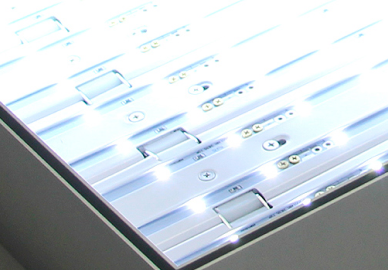
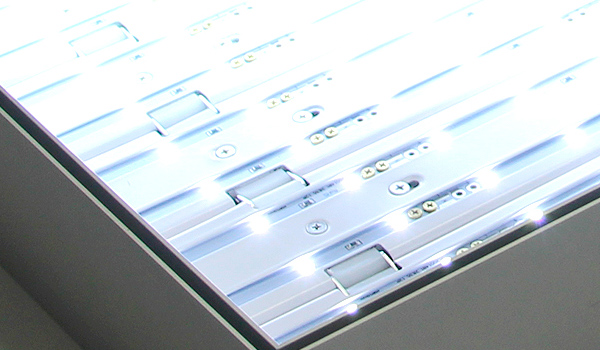
A quick online search on phrases such as “tinted sleeves for fluorescent lamps” will yield various suppliers who offer tinted sleeves that are easily slid over the fluorescent tubes in your lightbox. Blue River Digital has not tested these sleeves, but customers have reported success adding them to their lightboxes, either for a desired shift in color hue, or general brightness reduction. By the way – at the risk of stating the obvious – this strategy applies to fluorescent but not LED-powered lightboxes (unless your lamps happen to be “LED tube” design).
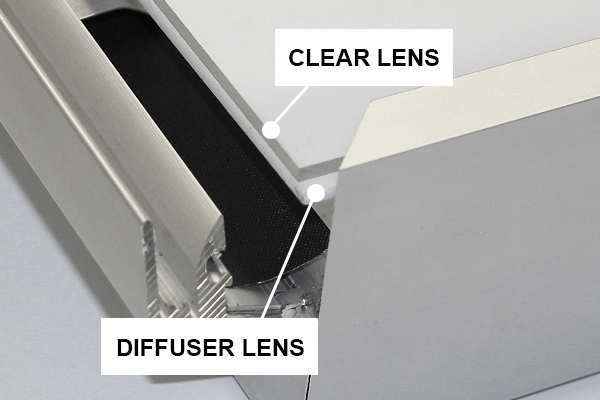
TINTED LENSES
Most lightboxes ship with a diffused white “back” lens and a clear “front” lens, between which the customer sandwiches their Duratrans backlit graphic film. Depending on the lightbox model and lens thickness / composition, tinted lenses with varying degrees of light-blocking properties can also be purchased from third-party suppliers. These tinted lenses can substitute for the original lens(es) included with your lightbox.
First ask your lightbox fabricator which “composition” and thickness is used for your lightbox model. Common lens substrates include acrylic (aka Plexiglas®), polycarbonate (aka Lexan®) and styrene. Also when you contact your fabricator, be sure to ask if the diffuser (back) lens is “etched” because if it is etched (a common feature of edgelit-design lightboxes), this lens is not replaceable, but the clear front lens still should be.
Then, locate a plastics distributor in your area, and visit their showroom with your original lens in hand, so you can compare translucence and thickness. They will usually offer advice and custom cutting services on the spot, even for small quantities.
THICKER OR MULTIPLE DIFFUSER LENSES
A hybrid of strategy #2, this is simply replacing your existing translucent white diffuser lens with a thicker one of same or similar “translucence” (ability to transmit partial light) — or, adding a second diffuser to further reduce light-thru. However, it should be noted, our experience is that the brightness reduction achieved by this strategy is marginal. An important prerequisite to this strategy is to confirm if the lightbox design has adequate clearance to hold the thicker lens material.
DARKEN YOUR GRAPHIC
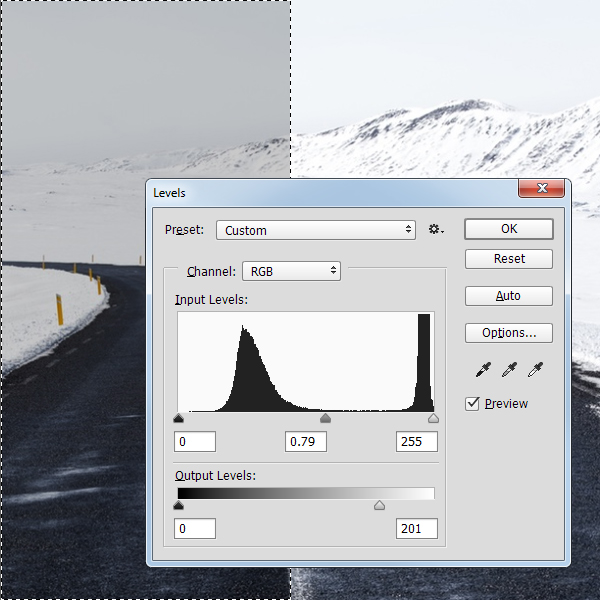
Using Photoshop® or similar software, you can darken the overall brightness of your artwork to any degree desired. If you choose this strategy to reduce your lightbox brightness, we recommend you print your graphic using the true, photographic “Duratrans” process, not inkjet. This is because the Duratrans process introduces a physical vector for opacity, which means darker colors will actually block some of the transmissive light, whereas the inkjet process only offers darker (muddier) formulations of translucent ink colors to achieve light reduction.
By the way, a really cool benefit of the Photoshop strategy is that you can selectively edit your graphic for brightness management. For example, what if you darken only the artwork’s background but leave the forward subject at “normal” brightness, for increased impact?
ADDITIONAL DURATRANS FILM
Our favorite brightness-reduction strategy is to add an additional sheet of Duratrans film behind your graphic. The “artwork” on the extra sheet is comprised of a solid, light gray field created by your graphic designer.
Not only is this the least invasive and quickest upgrade to apply, you can also easily adjust the brightness as desired simply by replacing the tint film with one of a different tint level. For example, say your Summer promotion graphic is way too bright so you add a 15% tint film behind it and now it’s just right. Then, maybe later you replace the Summer graphic with a Winter promotion graphic which already has a dark background, and now you don’t want the brightness reduced so much – so this time you replace your 15% tint film with a 5% film.
In addition to these workarounds for brightness management, there is still of course the idea of adding dimmable circuitry and lamps to your lightboxes. Most major fabricators, including Blue River Digital, offer dimmable upgrades to some if not all their lightbox models as new products, although the options for retrofitting dimmability to existing lightboxes are fairly limited, especially from a cost feasibility standpoint.